


MailChimp is one of the most popular email marketing service providers. MailChimp’s generous free account allows you to have 2000 subscribers and send 12,000 emails a month so that you can start your email marketing today. Go to mailchimp.com to register a free account if you don’t have one. Want to integrate MailChimp with your WordPress website and start to build your email list? In this post, I am going to show you how to create a Mailchip signup form using the MailChimp for WordPress plugin.
Though you can create a list form in MailChimp and insert the html code into your website, there is a better and easier way to add a MailChimp signup form with the help of MailChimp for WordPress plugin.
Step #1: Install MailChimp for WordPress plugin and activate it.
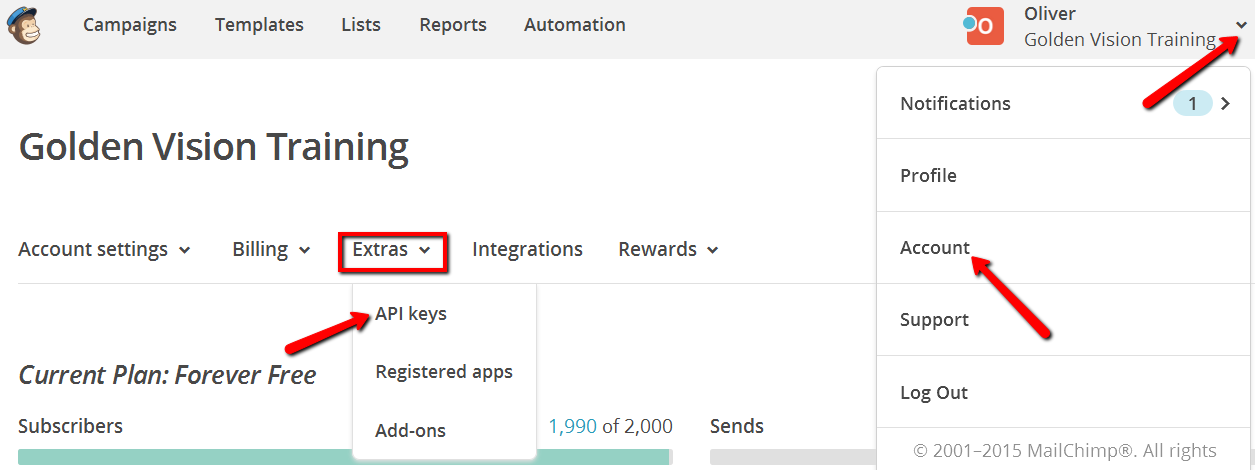
Step #2: Log in to your MailChimp account and generate an API key.
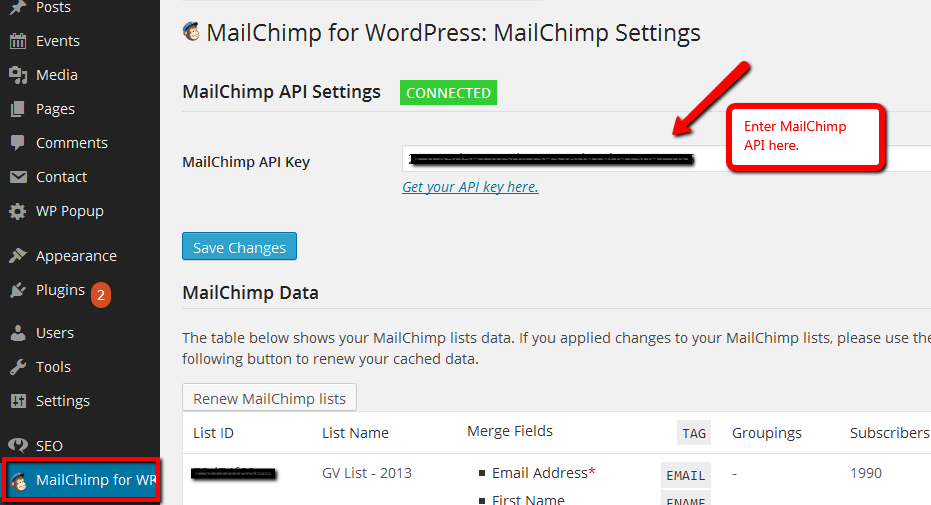
Step #3: Go to your WordPress website, click on “MailChimp for WordPress” link and enter the API key under MailChimp Settings.
Step #4: Configure your Checkbox Settings by selecting the lists, double opt-in or not and etc.

Step #5: Click on “Forms” to select the style of your form and the list this form subscribes to. You can also insert a new field in your form.
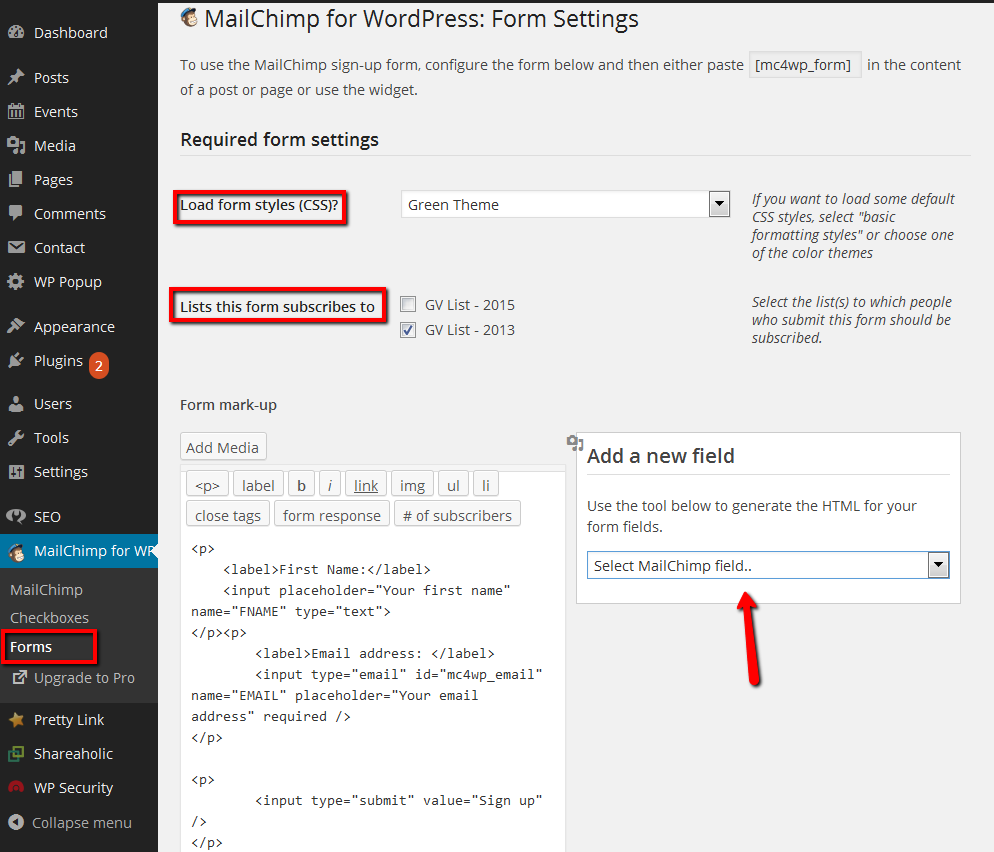
Step #6: Under the same “Form Settings,” you can get the shortcode of this form. You can also insert your thank-you page url to direct people to a custom thank-you page after sign-ups.

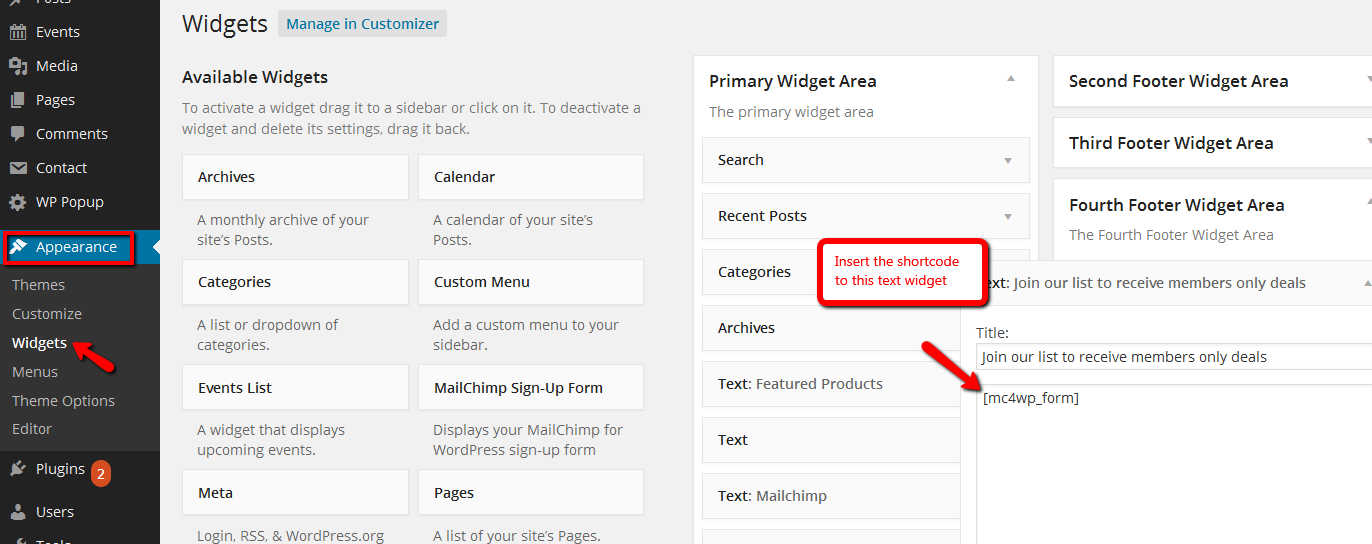
Step #7: Insert the shortcode into a text widget, post or page.
As you see, MailChimp for WordPress plugin is very easy to use. No wonder it gets more than 363 5-star ratings. There is a premium version of the plugin which gives you more form styles to choose, but the free version is good enough for most of the users.
Now follow the instructions to create your own signup form. If you find this tutorial helpful, join our mailing list to receive more digital marketing related updates and tutorials like this.

